반응형


0. 준비사항 : Python을 설치한다.
파이썬 패키지 매니저인 pip도 같이 설치되었을 것이다.
1. cmd창을 열고 다음과 같이 친다
pip install mediapipe opencv-python

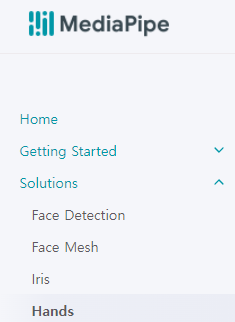
2. mediapipe 공식사이트에서 hand 예제를 긁어와 hand.py 로 저장한다.

import cv2
import mediapipe as mp
mp_drawing = mp.solutions.drawing_utils
mp_drawing_styles = mp.solutions.drawing_styles
mp_hands = mp.solutions.hands

# For static images:
IMAGE_FILES = []
with mp_hands.Hands(
    static_image_mode=True,
    max_num_hands=2,
    min_detection_confidence=0.5) as hands:
  for idx, file in enumerate(IMAGE_FILES):
    # Read an image, flip it around y-axis for correct handedness output (see
    # above).
    image = cv2.flip(cv2.imread(file), 1)
    # Convert the BGR image to RGB before processing.
    results = hands.process(cv2.cvtColor(image, cv2.COLOR_BGR2RGB))

    # Print handedness and draw hand landmarks on the image.
    print('Handedness:', results.multi_handedness)
    if not results.multi_hand_landmarks:
      continue
    image_height, image_width, _ = image.shape
    annotated_image = image.copy()
    for hand_landmarks in results.multi_hand_landmarks:
      print('hand_landmarks:', hand_landmarks)
      print(
          f'Index finger tip coordinates: (',
          f'{hand_landmarks.landmark[mp_hands.HandLandmark.INDEX_FINGER_TIP].x * image_width}, '
          f'{hand_landmarks.landmark[mp_hands.HandLandmark.INDEX_FINGER_TIP].y * image_height})'
      )
      mp_drawing.draw_landmarks(
          annotated_image,
          hand_landmarks,
          mp_hands.HAND_CONNECTIONS,
          mp_drawing_styles.get_default_hand_landmarks_style(),
          mp_drawing_styles.get_default_hand_connections_style())
    cv2.imwrite(
        '/tmp/annotated_image' + str(idx) + '.png', cv2.flip(annotated_image, 1))
    # Draw hand world landmarks.
    if not results.multi_hand_world_landmarks:
      continue
    for hand_world_landmarks in results.multi_hand_world_landmarks:
      mp_drawing.plot_landmarks(
        hand_world_landmarks, mp_hands.HAND_CONNECTIONS, azimuth=5)

# For webcam input:
cap = cv2.VideoCapture(0)
with mp_hands.Hands(
    model_complexity=0,
    min_detection_confidence=0.5,
    min_tracking_confidence=0.5) as hands:
  while cap.isOpened():
    success, image = cap.read()
    if not success:
      print("Ignoring empty camera frame.")
      # If loading a video, use 'break' instead of 'continue'.
      continue

    # To improve performance, optionally mark the image as not writeable to
    # pass by reference.
    image.flags.writeable = False
    image = cv2.cvtColor(image, cv2.COLOR_BGR2RGB)
    results = hands.process(image)

    # Draw the hand annotations on the image.
    image.flags.writeable = True
    image = cv2.cvtColor(image, cv2.COLOR_RGB2BGR)
    if results.multi_hand_landmarks:
      for hand_landmarks in results.multi_hand_landmarks:
        mp_drawing.draw_landmarks(
            image,
            hand_landmarks,
            mp_hands.HAND_CONNECTIONS,
            mp_drawing_styles.get_default_hand_landmarks_style(),
            mp_drawing_styles.get_default_hand_connections_style())
    # Flip the image horizontally for a selfie-view display.
    cv2.imshow('MediaPipe Hands', cv2.flip(image, 1))
    if cv2.waitKey(5) & 0xFF == 27:
      break
cap.release()
3. 파일의 위치로 가서 실행한다.
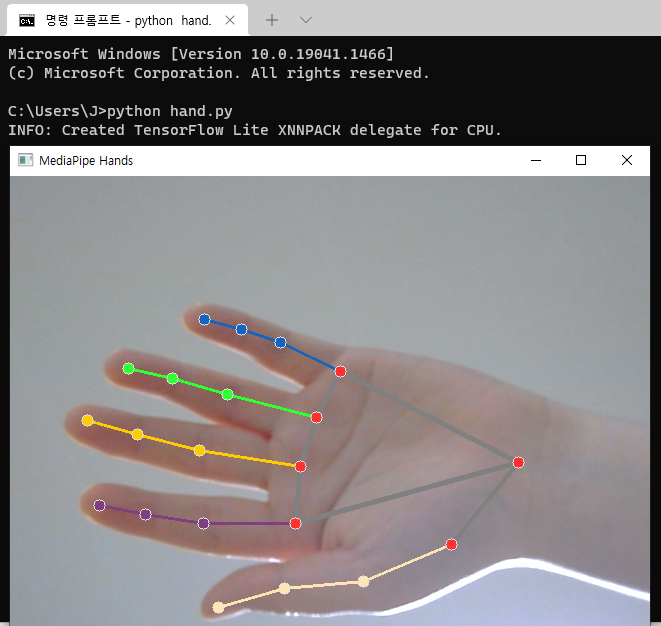
hand tracking이 제대로 실행 되는 것을 확인할 수 있다.

다만 처음 노트북이나 다른 컴퓨터로 테스트 시에는 문제없었는데 이후 동일 버전으로 집 데스크탑에서 실행 시 웹캠 로딩이 오래걸리는 문제가 있었다.
아래 문서를 참조해 해결함. import cv2 전에 아래 코드 추가
import os
os.environ["OPENCV_VIDEOIO_MSMF_ENABLE_HW_TRANSFORMS"] = "0"(https://github.com/opencv/opencv/issues/17687)
집 데스크탑에선 웹캠을 읽는 모든 프로젝트에 해당 코드를 추가해야한다..
반응형
'운영체제 > Windows' 카테고리의 다른 글
| WSL2 설치하기 (Windows Subsystem for Linux) (0) | 2022.10.01 |
|---|---|
| 윈도우에서 리눅스 개발환경 구축하기 WSL2 + VSCode (2) | 2022.09.30 |
| Windows ] 방화벽 포트 열기 (0) | 2022.09.25 |
| C ] Windows 에서 PThread 사용하기 (Visual Studio 사용) (0) | 2022.08.24 |
| Windows ] USB 시리얼 포트 변경하는 법 (0) | 2022.07.12 |


