개인 기록용 정리글
CPU1 설정
// Set up the auxiliary PLL so a 60 MHz output clock is provided to the USB module.
// This fixed frequency is required for all USB operations.
SysCtl_setAuxClock(SYSCTL_AUXPLL_OSCSRC_XTAL |
                   SYSCTL_AUXPLL_IMULT(48) |
                   SYSCTL_REFDIV(2U) | SYSCTL_ODIV(5U) |
                   SYSCTL_AUXPLL_DIV_2 |
                   SYSCTL_AUXPLL_ENABLE |
                   SYSCTL_DCC_BASE_0);

// Allocate Shared Peripheral USB to the CM Side.
SysCtl_allocateSharedPeripheral(SYSCTL_PALLOCATE_USBA, 1);

// Set the master core of GPIOs to CM.
GPIO_setMasterCore(42, GPIO_CORE_CM);
GPIO_setMasterCore(43, GPIO_CORE_CM);
GPIO_setMasterCore(46, GPIO_CORE_CM);
GPIO_setMasterCore(47, GPIO_CORE_CM);
GPIO_setMasterCore(120, GPIO_CORE_CM);
GPIO_setMasterCore(121, GPIO_CORE_CM);

// Set the USB DM and DP GPIOs.
GPIO_setAnalogMode(42, GPIO_ANALOG_ENABLED);
GPIO_setAnalogMode(43, GPIO_ANALOG_ENABLED);

// Set the direction for VBUS and ID.
GPIO_setDirectionMode(46, GPIO_DIR_MODE_IN);
GPIO_setDirectionMode(47, GPIO_DIR_MODE_IN);

// Configure the Power Fault.
GPIO_setMasterCore(120, GPIO_CORE_CM);
GPIO_setDirectionMode(120, GPIO_DIR_MODE_IN);

// Configure the External Power Signal Enable.
GPIO_setMasterCore(121, GPIO_CORE_CM);
GPIO_setDirectionMode(121, GPIO_DIR_MODE_OUT);
GPIO_writePin(121, 1);

// Set the CM Clock to run at 120MHz.
// The CM Clock is a fractional multiple of the AUXPLL Clock (120 Mhz) from
// which the USB Clock (60 MHz) is derived.
SysCtl_setCMClk(SYSCTL_CMCLKOUT_DIV_1, SYSCTL_SOURCE_AUXPLL);

Device_bootCM(BOOTMODE_BOOT_TO_FLASH_SECTOR0);
주의할 점은 보통 CM을 최대 클럭인 125MHz 로 사용하는데 USB 모듈에 60MHz를 공급하기 위해서는 CM 클럭을 120MHz로 사용해야 한다. 그러니 CM에서 사용하는 페리페럴이 CM 클럭으로 부터 공급받는다면 다 120MHz로 수정해줄 필요가 있다. 참고로 이더넷은 CM에서 사용하긴하지만 PHY clock은 다른소스에서 공급받으므로 영향이 없다.
그리고 TRM 717 페이지의 boot flow를 확인하면 boot CM 할때도 클락정보가 넘어간다.

CPU2 설정
cm.h
#undef  CM_CLK_FREQ
#define CM_CLK_FREQ       120000000U
USB 라이브러리는 아래 경로에 있다.
C:\ti\c2000\C2000Ware_4_02_00_00\libraries\communications\usb\f2838x
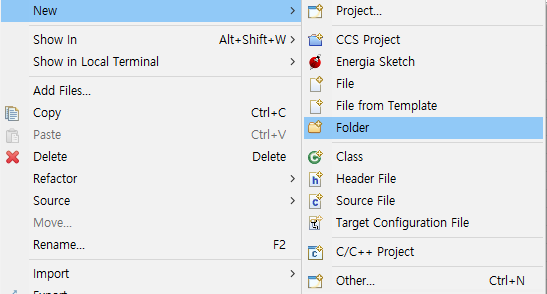
원본이 변경되지 않게 복사해서 워크스페이스로 가져온다. 이중에서 필요한건 include와 lib 폴더이다. docs에는 TI사에서 만든 USB 라이브러리에 대한 매뉴얼이 포함되어 있다. 나머지는 삭제하거나 빌드제외하면 되는데 source같은 경우 참고하면서 보려고 빌드제외 해두었다.

참고로 추가할 때 Linked folder로 추가해두면 같은 워크스페이스 내에있는 프로젝트들은 해당 폴더를 공유해서 사용할 수 있다.
라이브러리 폴더에 대한 Path Variable을 상대경로로 지정해두고 해당경로로 Linked Folder를 프로젝트에 추가하면 재사용성이 좋아진다.


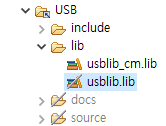
USB 라이브러리를 cm에서 사용할거니 usblib.lib는 빌드제외한다.
다음 fatfs 라이브러리는 아래 경로에 있다. 역시 복사해서 USB_LOC 안으로 가져온다.
C:\ti\c2000\C2000Ware_4_02_00_00\utilities\third_party\f2838x\fatfs
이 중에서 사용하는 건 port 폴더의 fat_usbmsc.c, src 폴더의 ff.c, ff.h, diskio.h, integer.h 뿐이다. 나머지는 삭제 또는 빌드제외 한다.
그리고 src폴더의 readme 파일은 코드 크기를 줄이기위한 설정에 대한 설명이 있으니 읽어보는 것이 좋다.

다음 헤더파일을 찾을 수 있게 USB_LOC 와 USB_LOC\include 를 include options에 추가해준다.
그 다음은 예제에서 쓸데없는 부분은 버리고 필요한 내용만 가져와 USBapp.c 와 USBapp.h 를 재구성하였다.
USB 초기화 함수
필요한 콜백함수를 등록한다.
void init_USB(void)
{
    // Initially wait for device connection.
    g_eState = STATE_NO_DEVICE;
    g_eUIState = STATE_NO_DEVICE;

    // Configure the External Power Signal Enable.
    GPIO_writePin(121, 1);

    // Register the interrupt handler, for USB.
    Interrupt_registerHandler(INT_USB0, &CM_USB0HostIntHandler);

    // Enable interrupts now that the application is ready to start.
    Interrupt_enableInProcessor();

    // Initialize the USB stack mode and pass in a mode callback.
    USBStackModeSet(0, eUSBModeForceHost, ModeCallback);

    // Register the host class drivers.
    USBHCDRegisterDrivers(0, g_ppHostClassDrivers, NUM_CLASS_DRIVERS);

    // Open an instance of the mass storage class driver.
    g_psMSCInstance = USBHMSCDriveOpen(0, (tUSBHMSCCallback)MSCCallback);

    // Initialize the power configuration.  This sets the power enable signal to be active high and does not enable the power fault.
    USBHCDPowerConfigInit(0, USBHCD_VBUS_AUTO_HIGH | USBHCD_VBUS_FILTER);

    // Initialize the USB controller for Host operation
    USBHCDInit(0,g_pHCDPool, HCD_MEMORY_SIZE);

    // Initialize the file system.
    f_mount(0, &g_sFatFs);
}
그리고 USB모듈을 사용하기 위해 가장 중요한 함수는 예제에서 ReadLine(); 함수안에 숨겨져있다.
USBHCDMain();
이 함수가 main loop에서 계속 호출이 되어야지만 USB 모듈이 돌아간다.
현재 USB 상태를 뜻하는 전역변수 g_eState 는 ISR에서 상태가 변경되고 main loop 에서 주기적으로 상태를 감지해 이전 상태와 달라졌으면 필요한 행동을 취한다.
USB 상태가 STATE_DEVICE_ENUM 인 경우에는 성공할 때까지 USBHMSCDriveReady(g_psMSCInstance) 함수를 호출하고 리턴값이 0이면 device가 준비된 상태로 루트 디렉터리를 open 하고 STATE_DEVICE_READY 상태로 바꾼다.
만약 device가 준비되지 않아 USBHMSCDriveReady() 리턴값이 0이 아닌 경우 특정 시간 delay 후 재시도하게 되어있었는데 NonBlocking 방식 코드로 교체하고 필요없는 코드를 제거했다.
메인 loop 안에 집어넣을 USB_process() 함수
extern volatile uint32_t timeTick;

void USB_process(void)
{
    static uint32_t tick = 0;
    static uint8_t state = 0;
    tState eStateCopy;

    // Run the main routine of the Host controller driver.
    USBHCDMain();

    // ENUM 상태인경우 성공할때까지 100ms 간격으로 USBHMSCDriveReady() 및 root 디렉터리 open 시도
    if(g_eState == STATE_DEVICE_ENUM)
    {
        switch(state)
        {
        case 0:
            tick = timeTick;
            state = 1;
            break;
        case 1:
            if((timeTick - tick) >= 100)
            {
                // Take it easy on the Mass storage device if it is slow to start up after connecting.
                if(USBHMSCDriveReady(g_psMSCInstance) == 0)
                {
                    // Reset the working directory to the root.
                    g_cCwdBuf[0] = '/';
                    g_cCwdBuf[1] = '\0';

                    // Attempt to open the directory.
                    // Some drives take longer to start up than others, and this may fail (even though the USB device has enumerated) if it is still initializing.
                    f_mount(0, &g_sFatFs);
                    if(f_opendir(&g_sDirObject, g_cCwdBuf) == FR_OK)
                    {
                        // The drive is fully ready, so move to that state.
                        g_eState = STATE_DEVICE_READY;
                        state = 0;
                    }
                }
                else
                {
                    tick = timeTick;
                }
            }
            break;
        default:
            break;
        }
    }

    // See if the state has changed.
    // We make a copy of g_eUIState to prevent a compiler warning about undefined order of volatile accesses.
    eStateCopy = g_eUIState;
    if(g_eState != eStateCopy)
    {
        // Determine the new state.
        switch(g_eState)
        {
            // A previously connected device has been disconnected.
            case STATE_NO_DEVICE:
            {
                if(g_eUIState == STATE_UNKNOWN_DEVICE)
                    UartPrint("Unknown device disconnected.");
                else
                    UartPrint("Mass storage device disconnected.\n");
                break;
            }
            // A mass storage device is being enumerated.
            case STATE_DEVICE_ENUM:
                break;
            // A mass storage device has been enumerated and initialized.
            case STATE_DEVICE_READY:
            {
                UartPrint("Mass storage device connected.\n");
                break;
            }
            // An unknown device has been connected.
            case STATE_UNKNOWN_DEVICE:
            {
                UartPrint("Unknown device connected.\n");
                break;
            }
            // A power fault has occurred.
            case STATE_POWER_FAULT:
            {
                UartPrint("Power fault.\n");
                break;
            }
            default:
                break;
        }
        // Save the current state.
        g_eUIState = g_eState;
    }
}
아무튼 예제는 standalone에서만 정상작동하던 문제도 있어서 예제에서 시작하는 것보다 필요한 부분만 가져오는게 낫다. 그리고 특이한건 CPU 성능차이를 고려한다고 하더라도 cpu1에서 usb 운용하고 f_getfree() 호출하는 것보다 cm에서 f_getfree() 호출하는게 시간을 훨씬 많이 잡아먹더라.

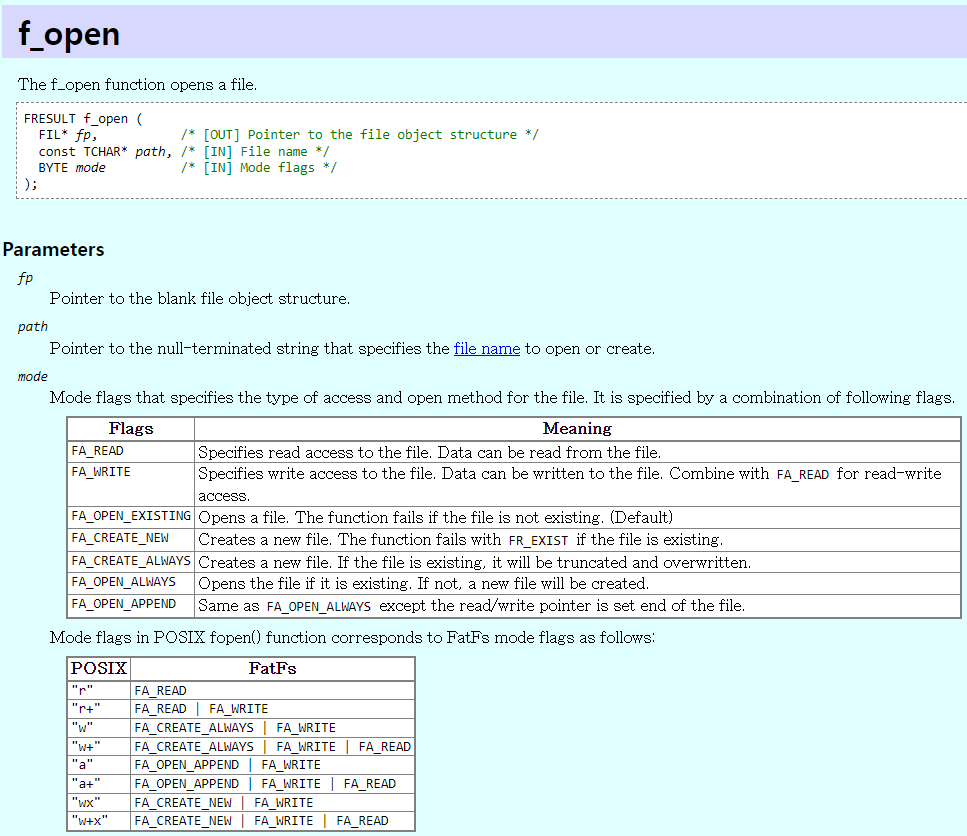
참고로 데이터 로그를 남기기 위해 파일이 존재하지 않으면 생성하고 존재하는 경우 이어쓰기 하려면, FA_WRITE | FA_OPEN_ALWAYS 모드로 파일을 열고 f_lseek() 함수로 파일 포인터를 파일의 마지막 위치로 보낸 다음 f_write()를 하면된다.
    // Open the file for writing.
    fresult = f_open(&g_sFileObject, g_cTmpBuf, FA_WRITE | FA_OPEN_ALWAYS);

    // Check for error and return if there is a problem.
    if(fresult != FR_OK)
    {
        return(fresult);
    }

    fresult = f_lseek(&g_sFileObject, g_sFileObject.fsize);

    if(fresult != FR_OK)
    {
        return(fresult);
    }

    fresult = f_write(&g_sFileObject, data,  size, &usBytesWritten);

    // Check for error and return if there is a problem.
    if(fresult != FR_OK)
    {
        return(fresult);
    }

    // Close the file after done with it.
    f_close(&g_sFileObject);
f_open() 의 mode 참고.
'임베디드 개발 > TMS320F2838x (C28x)' 카테고리의 다른 글
| TMS320F28388D ] 터미널 모니터와 메모리 덤프 (0) | 2023.01.10 |
|---|---|
| TMS320F28388D ] 링버퍼 사용 SCI 에코백 (0) | 2022.12.30 |
| TMS320F28388D ] CPU2에서 SD카드 사용 + 속도 테스트 (0) | 2022.12.28 |
| TMS320F28388D ] DMA 예제 (0) | 2022.12.11 |
| TMS320F28388D ] DMA 파악하기 (0) | 2022.12.11 |


